Naturally Dyed Eggs for Easter - a tutorial

Dyeing eggs for Easter is a traditional craft that has it’s origins in pagan Springtime festivals. Like many things, different religions have appropriated aspects and now today we in the Southern Hemisphere celebrate an Autumn-Wintery version of renewal and new growth after the Northern Hemisphere’s Winter’ dark. I like to try to teach my children about the traditional aspects of what gets celebrated in the Christian calendar, and we also have conversations about the commercialisation of it all as well. In the end, it’s just a long weekend of chocolate, family and resting (or lots of cooking for my mother-in-law).
Over the past few years I’ve actually stayed home alone while Sam and the kids visit his parents and family. I concentrate on my writing and art-making, and being able to make whatever meals I want whenever I want. And eating chocolate too, of course!
Which means that I haven’t made any naturally dyed eggs or Easter crafts for a couple of years now. Combined with the fact that the big kids no longer have Easter hat parade at school (oh the beautiful hats we’ve made from forest gatherings), and the little one not yet big enough for those school activities. But I did realise that this beautiful naturally dyed project that I created a few years ago wasn’t on my blog. And now seems like the perfect time to find the photos in my archives and share a simple, fun tutorial with you. Perhaps we will make some, because our local farmers market has an egg seller with glorious white eggs - often hard to find. These make the colours more vibrant with natural dyeing.

How to make Naturally Dyed Eggs
You’ll need:
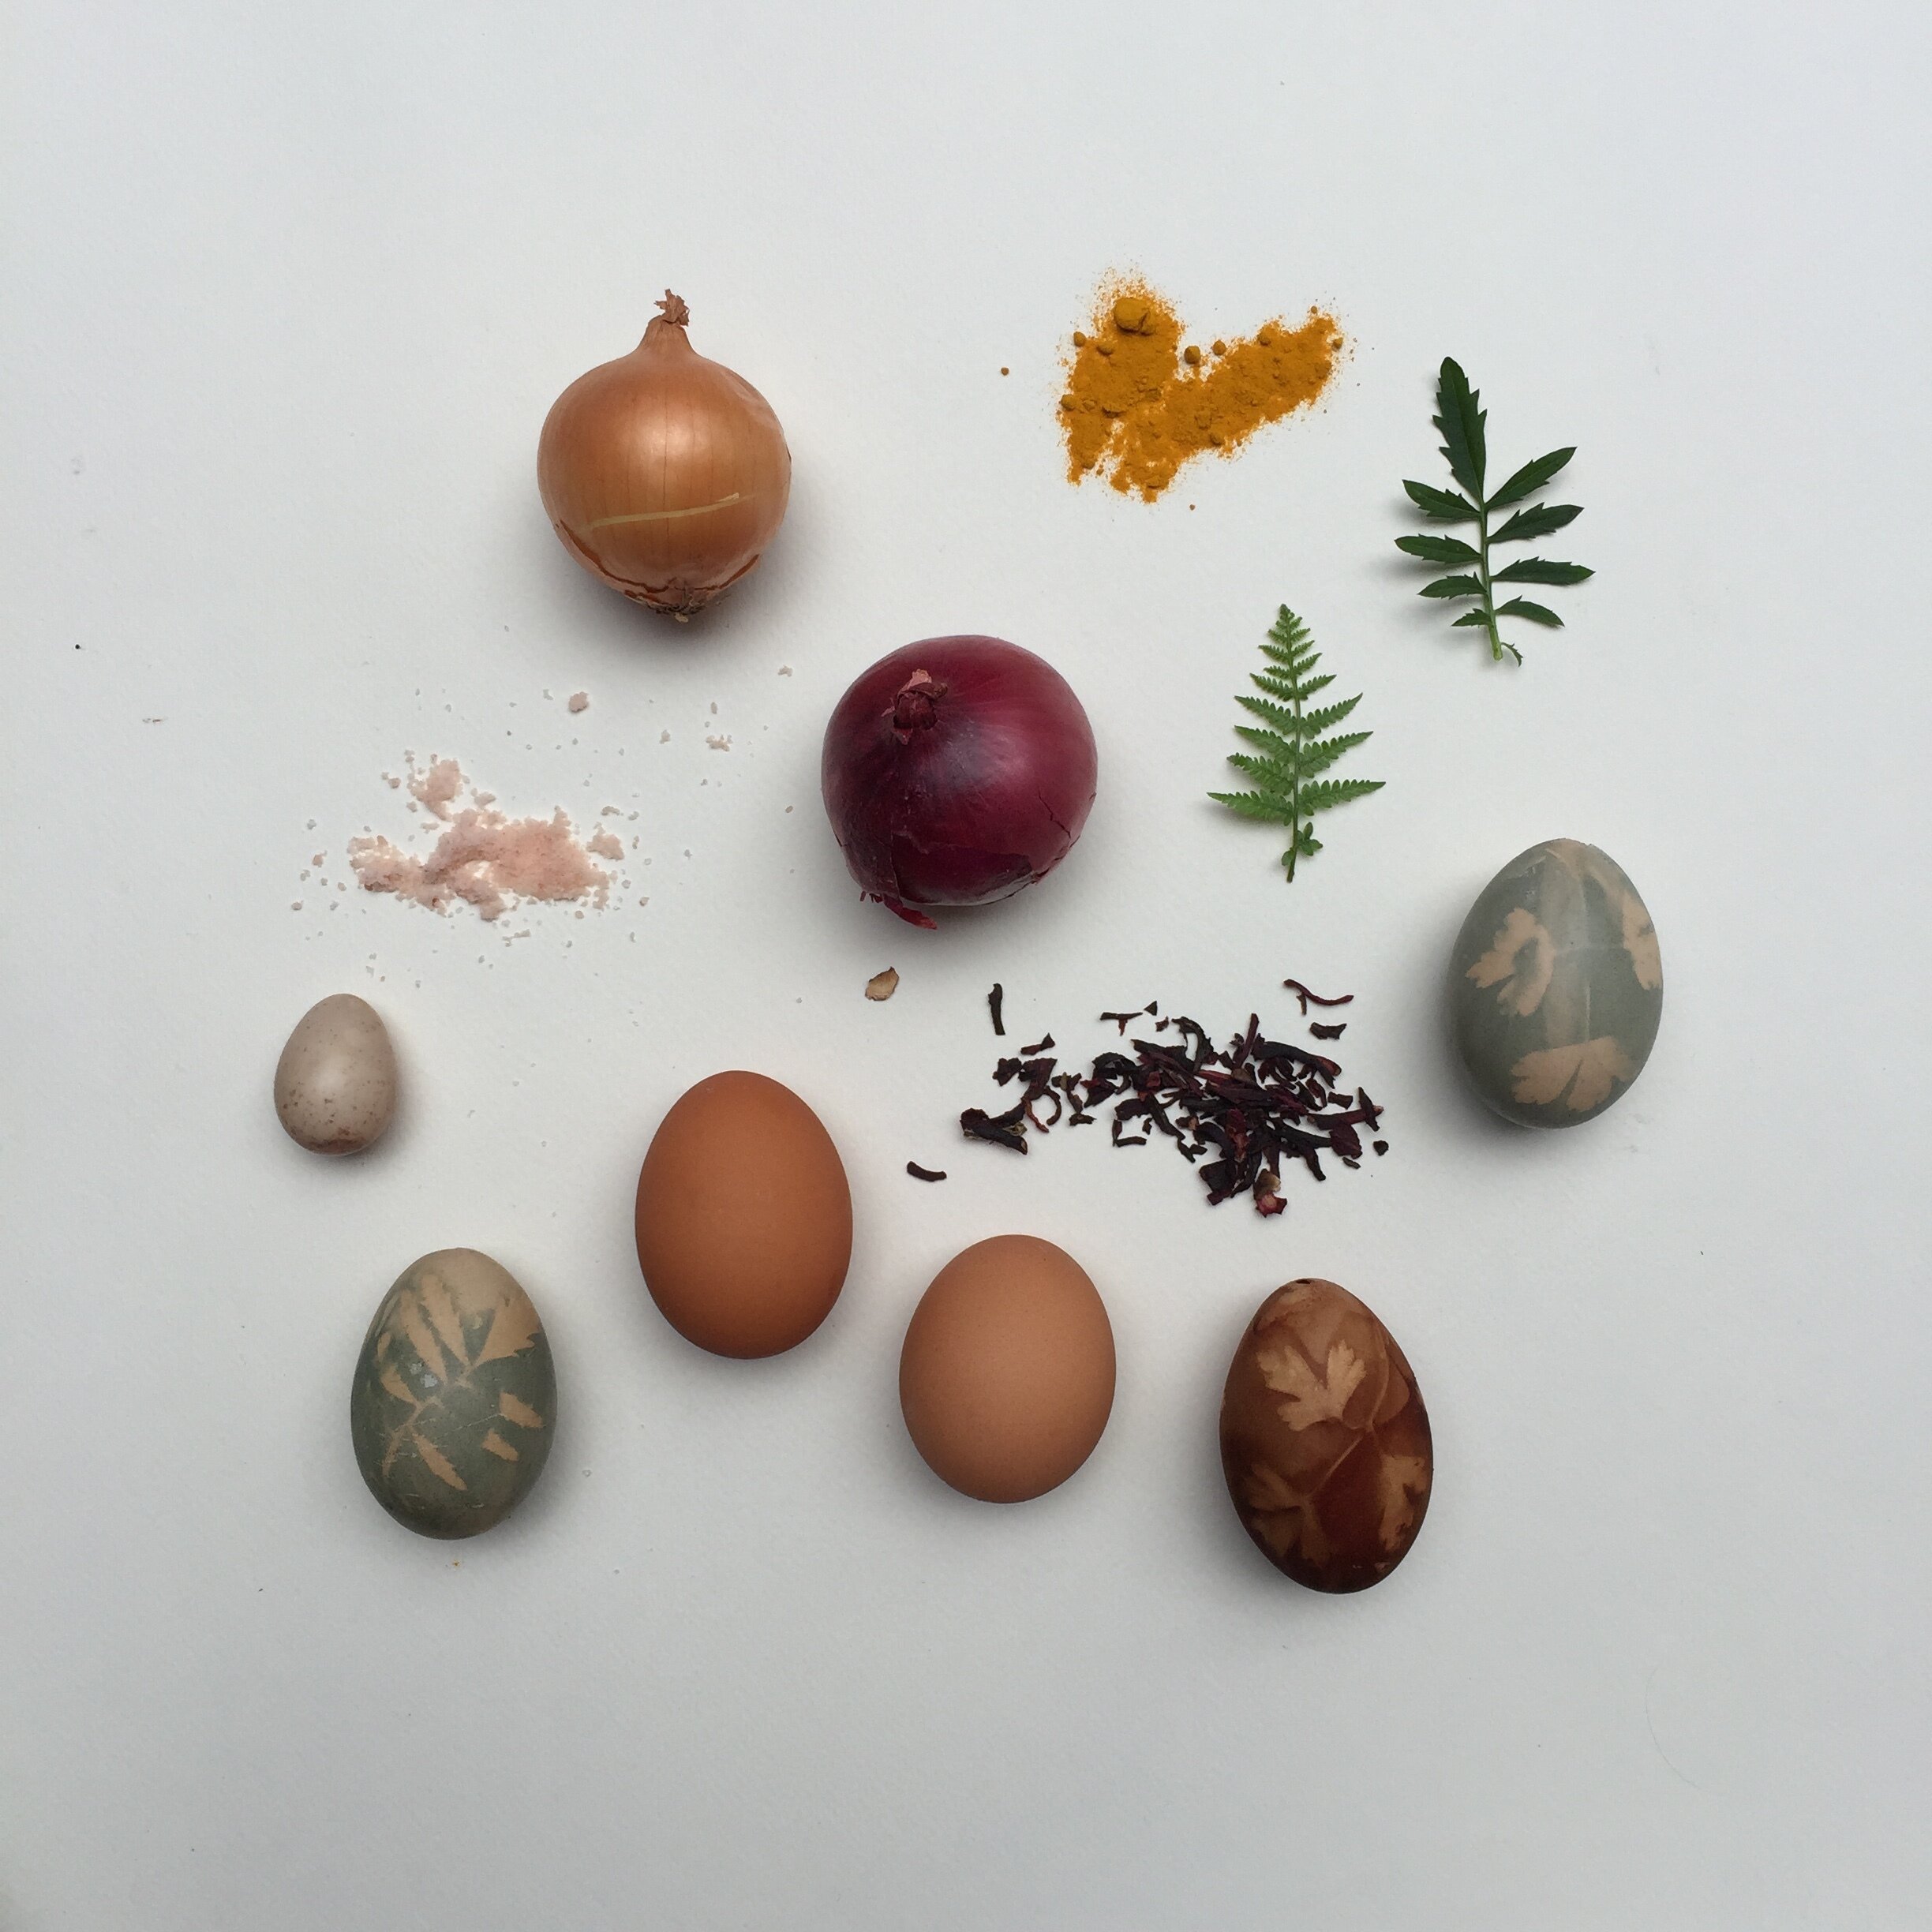
Eggshells from Free Range Eggs (please), as white or pale as you can find. I blow out the insides and use for baking. You could also crack the eggs to create little nests. Whatever you do - save the eggs for eating.
Dye colours are made from:
Turmeric - makes yellow
Red cabbage - makes blues, purples & pinks
Onion skins; brown & red ones - makes yellows, reds & goldens
Hibiscus tea - makes pinks
Coffee or tea - makes various browns
Spirulina - makes green
Avocado seeds or skin (washed very clean) - makes pinks
Beetroot - makes pinks
Blueberries - makes blues and soft greys
Vinegar
Bicarb soda
Saucepans and vessels for the eggs to soak in
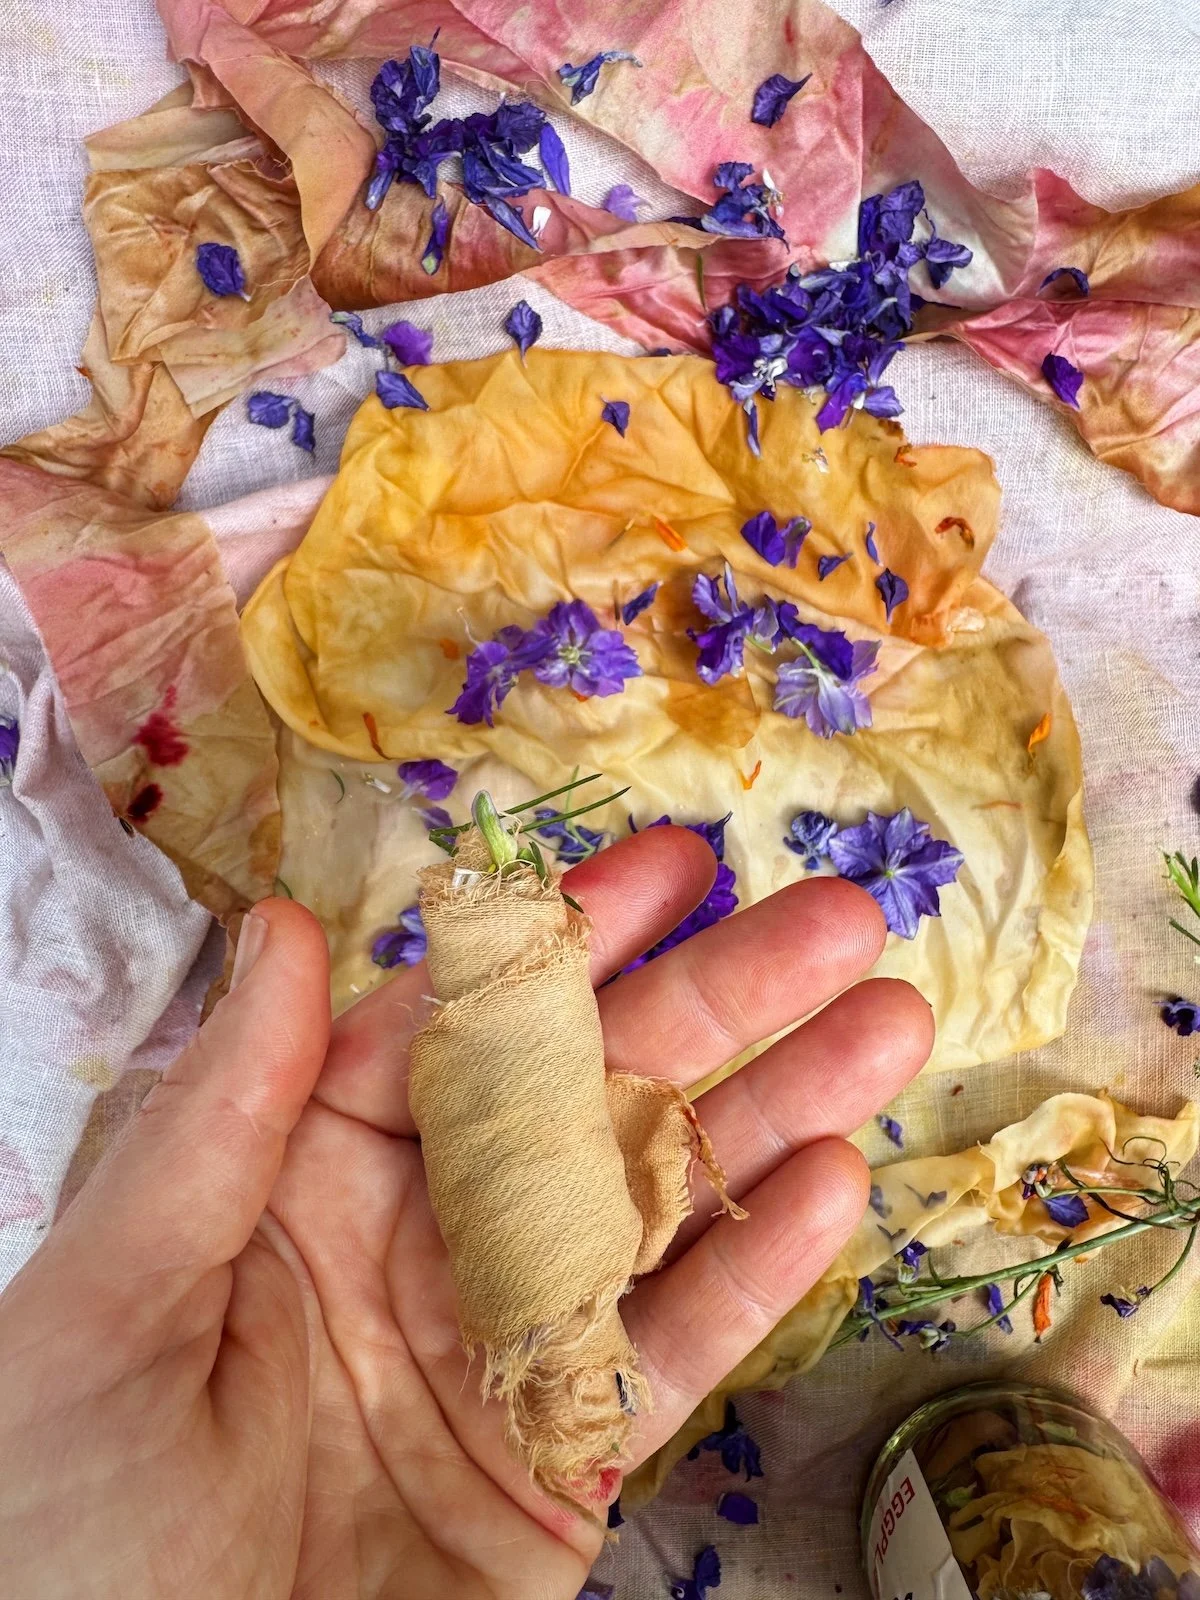
Small leaves and flowers from the garden - soft herbs are good
Old stockings and string or rubber bands
What to do:
Blow the eggs out of the shells by putting a pin hole in the top and bottom. This is time consuming and a little hard, but not terribly hard. You could also hard boil the eggs and eat them. Or crack the eggshells and use them this way in your displays. Wash the shells well.
In a small saucepan bring water to a gentle simmer - don’t boil. With each individual ingredient make a dye bath - a little like brewing soup or Turkish coffee. Some colours might take longer to brew than others, depending on the depth of colour you want. Cut the beets and cabbage into small pieces. Use about a teaspoon or so of turmeric and the teas. A handful of onion skins should be good, and 3 or so avocado seeds gently simmered.
Put each different dye bath into a container, a bowl or glass jar that’s big enough to hold how many eggs you’ll be dyeing in each colour. Make a few containers of each colour, because you can now shift the colours using the vinegar or bicarb
Red cabbage is particularly excellent for colour shifting - the anthrocyanins in red flowers, leaves, vegetables is very sensitive to different pH. Start with your first purple bath, then add vinegar to one jar, and bicarb to another. Watch the colour change straight away.
Using your leaves and flowers lay them onto the clean dry egg shells, and tie them in place with the pieces of stocking into small pieces. Make sure you tie it as tightly but gently as possible. This creates a resist for the dye, so you’ll get patterns of white egg where the colour can’t reach.
Now immerse your eggs into the dye baths, pushing them in until all the air bubbles come out and they’re covered in the warm dye. Leave them there for at least half an hour. Then allow to dry, and re-dip if you want the colour darker. Let them fully dry before you remove the stockings.
At this stage you can also over-dye, putting one dyed egg into another colour. Natural dye colours mix in the same way as paints - so create different hues by building up the colour.
Once they’re dry you can rub with a little cooking oil to make them shine if you wish. Try not to touch the eggs when they’re still wet as the colour can come off or your finger prints can make marks.