

Flower-Dyed Fabric: A Step-by-Step Guide to Eco Printing and Bundle Dyeing
How to naturally dye fabric with flowers: A botanical colour guide for creatives
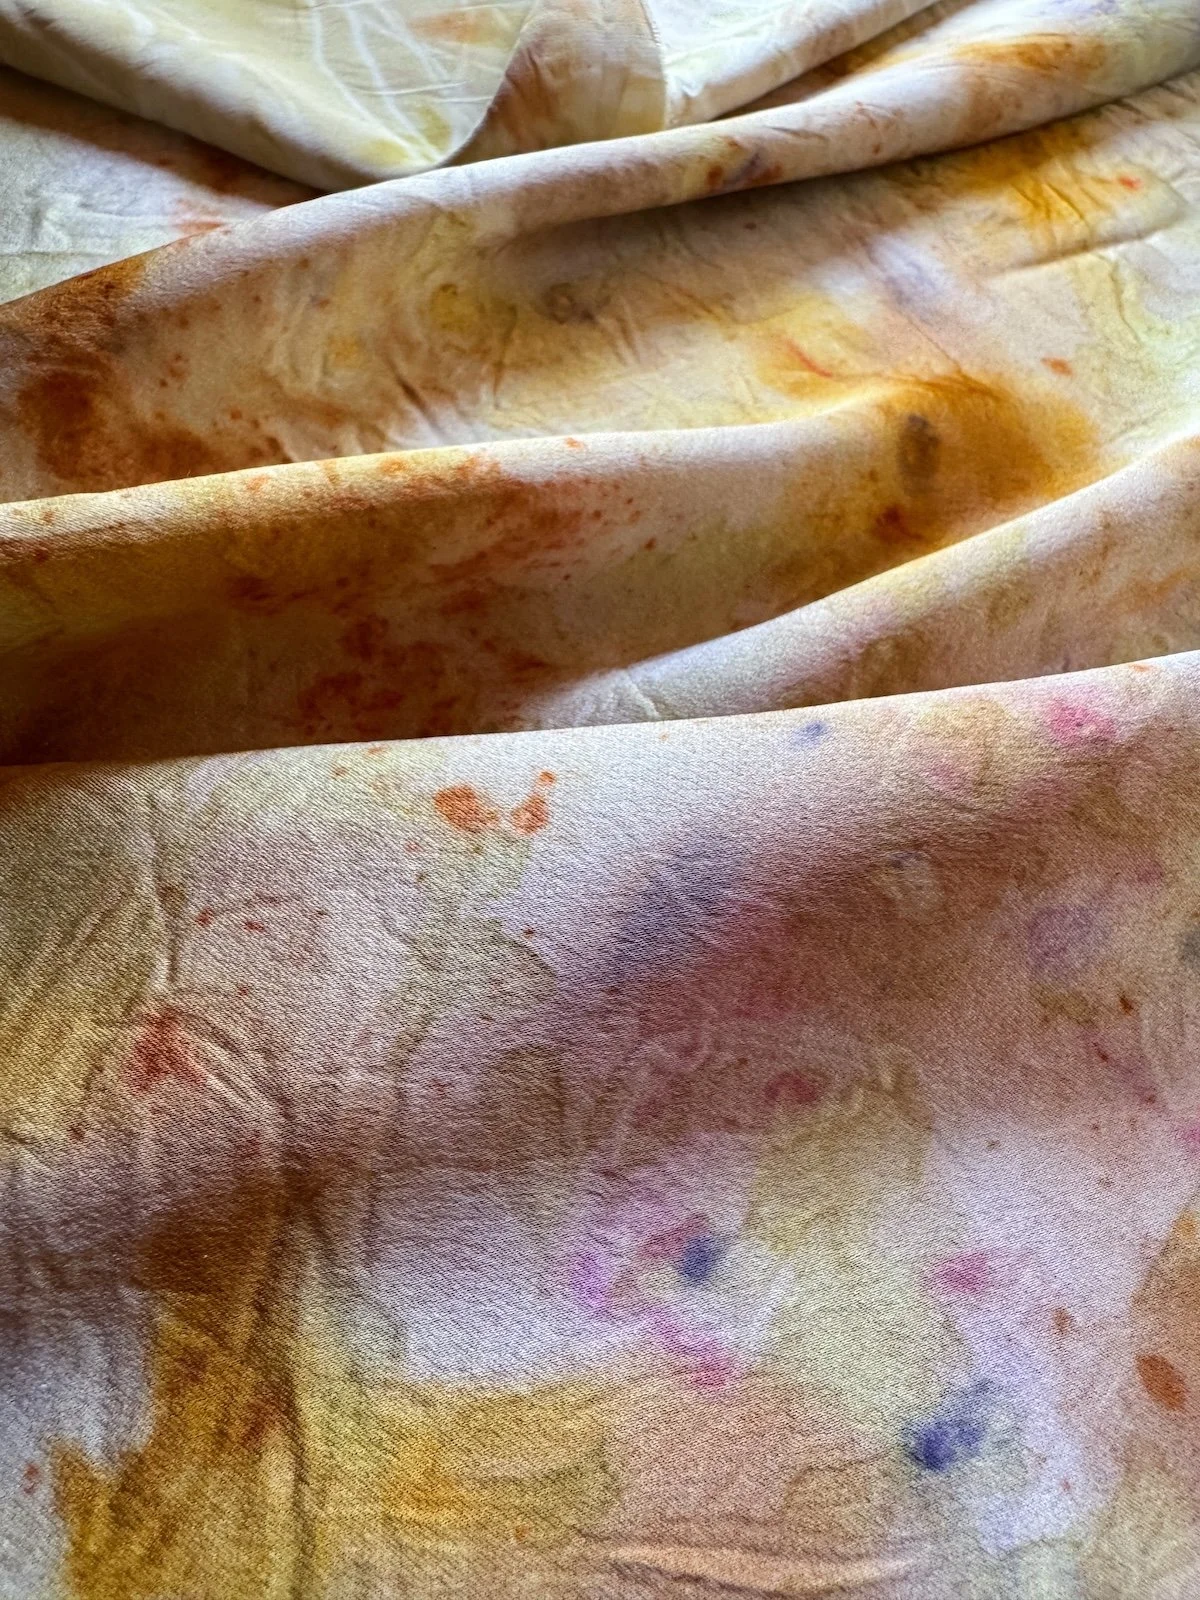
There’s something joyfully magical about unwrapping a freshly steamed fabric bundle to find petal prints and gentle water colour washes —each one a collaboration between you and nature. Art, science, alchemy, and a little bit of luck.
If you’ve ever wanted to try natural dyeing with flowers, this step-by-step guide will walk you through my favourite techniques: bundle dyeing (often called eco printing) is where you gather flowers and leaves from your garden, local landscape, or even a florists cut offs.
There are so many different blooms you can use, but I’m just going to start simply here. Sometimes the most unexpected flowers and leaves can give the best results.
In this little piece I’ve used marigolds, delphinium, eucalyptus leaves, onion skins, dandelions, and a few other little weeds from the garden. But in my Sunshine Keepsake Pouch tutorial I show how to use delicious coreopsis flowers that give stunning results.
What you’ll need:
Materials:
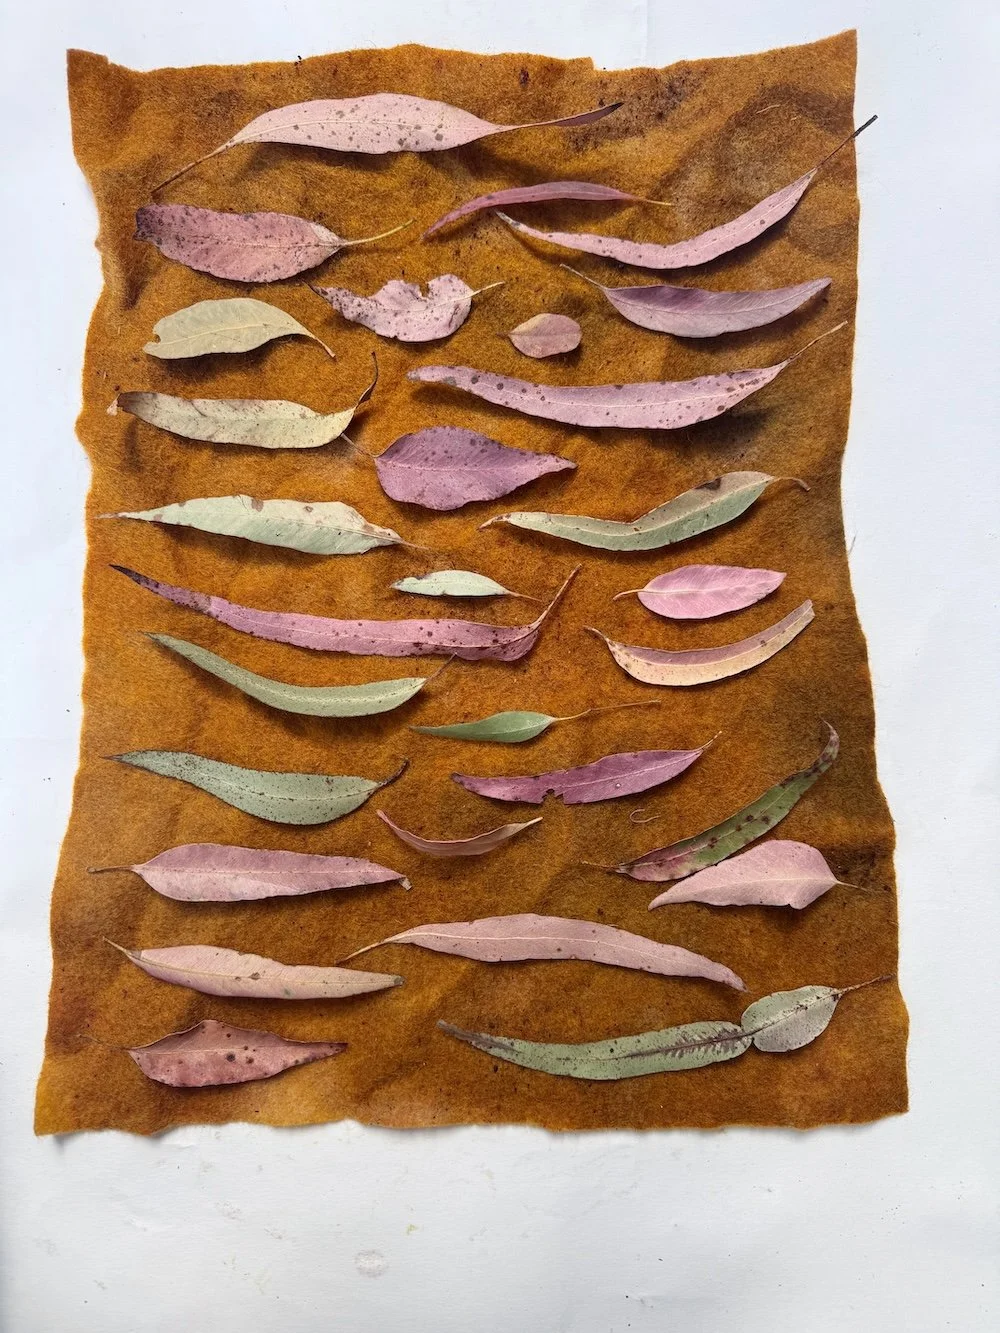
A piece of natural fabric (wool, cotton, silk, or linen work best. I’m using wool felt for this project, as it’s so great to dye with and then stitch as well). Read more here about how to choose fabrics for natural and botanical dyeing.
Fresh or dried flowers: I’ve used marigolds, coreopsis, delphinium, onion skins, and eucalyptus leaves. (See below for suggestions).
A mordant (alum is the gentlest and easiest to use)
A pot or steamer
String or twine
A spray bottle of water
Optional iron water for colour shifting. Read this blog post on how to make your own iron water for natural dyeing.
Tip: It’s a great idea to pre-wash your fabric to remove any sizing or residue—it helps the dyes bond beautifully. But I often buy ready to dye fabric, so can skip this step.
Step 1: Prepare your fabric
Soak your fabric in a warm water and alum solution for at least an hour (or overnight if you’re patient). This helps the plant pigments bind to the fibres. This is called pre-mordant.
Squeeze it dry so it’s damp but not dripping. It’s possible to do a whole batch of pre-mordanting on all your fibres at once, then fully rinse and dry them for a later dye session. Or do it just before you’re ready to dye.
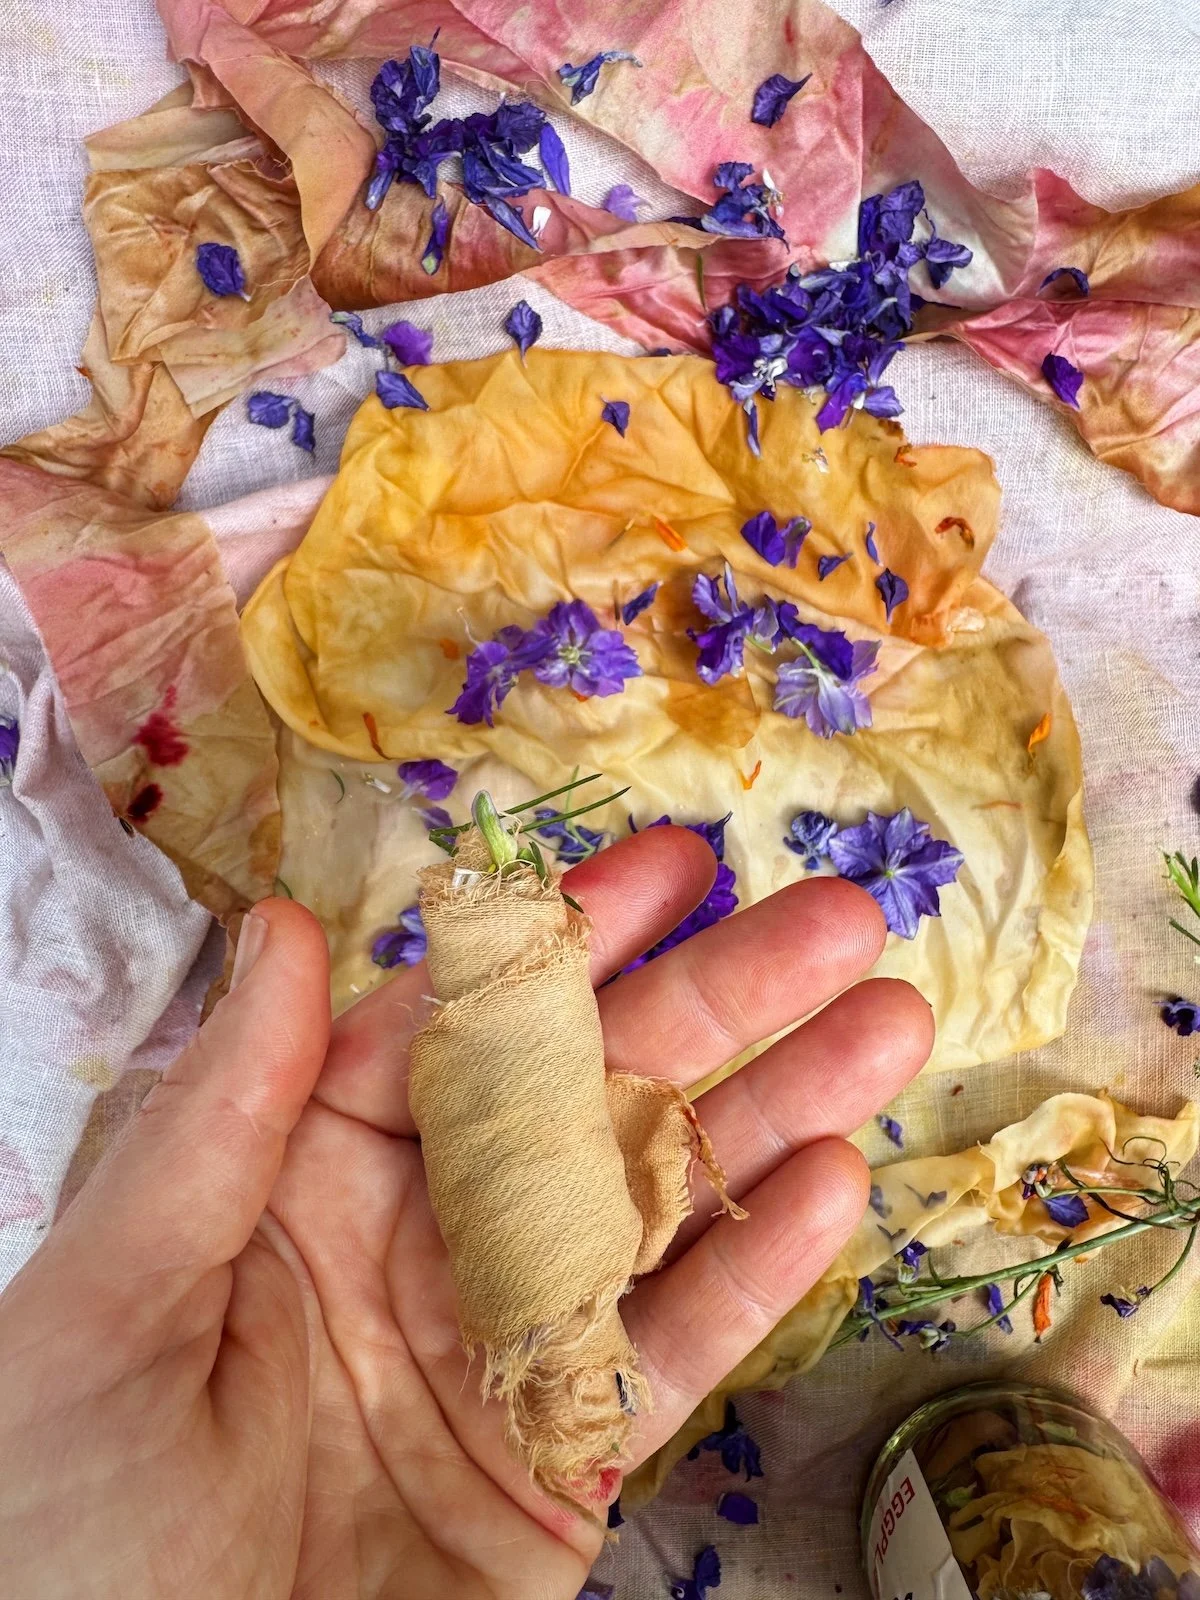
Step 2: Arrange your flowers and leaves.
Lay your fabric flat on a clean surface. Spray it with your water spray bottle; this helps the petals stay, as well as makes sure your fabric is fully wetted before putting in the dye pot.
Sprinkle or carefully place your petals and leaves across the fabric — be as random and organic, or as designed as you’d like. Experiment and see what results you prefer.
Marigolds gives yellows or muted greens, coreopsis and dandelions give sunny yellows and oranges, delphinium offers soft blues and purples, and eucalyptus leaves create gentle greys and russet tones.
You can experiment with patterns — try stripes, spirals, or clusters.
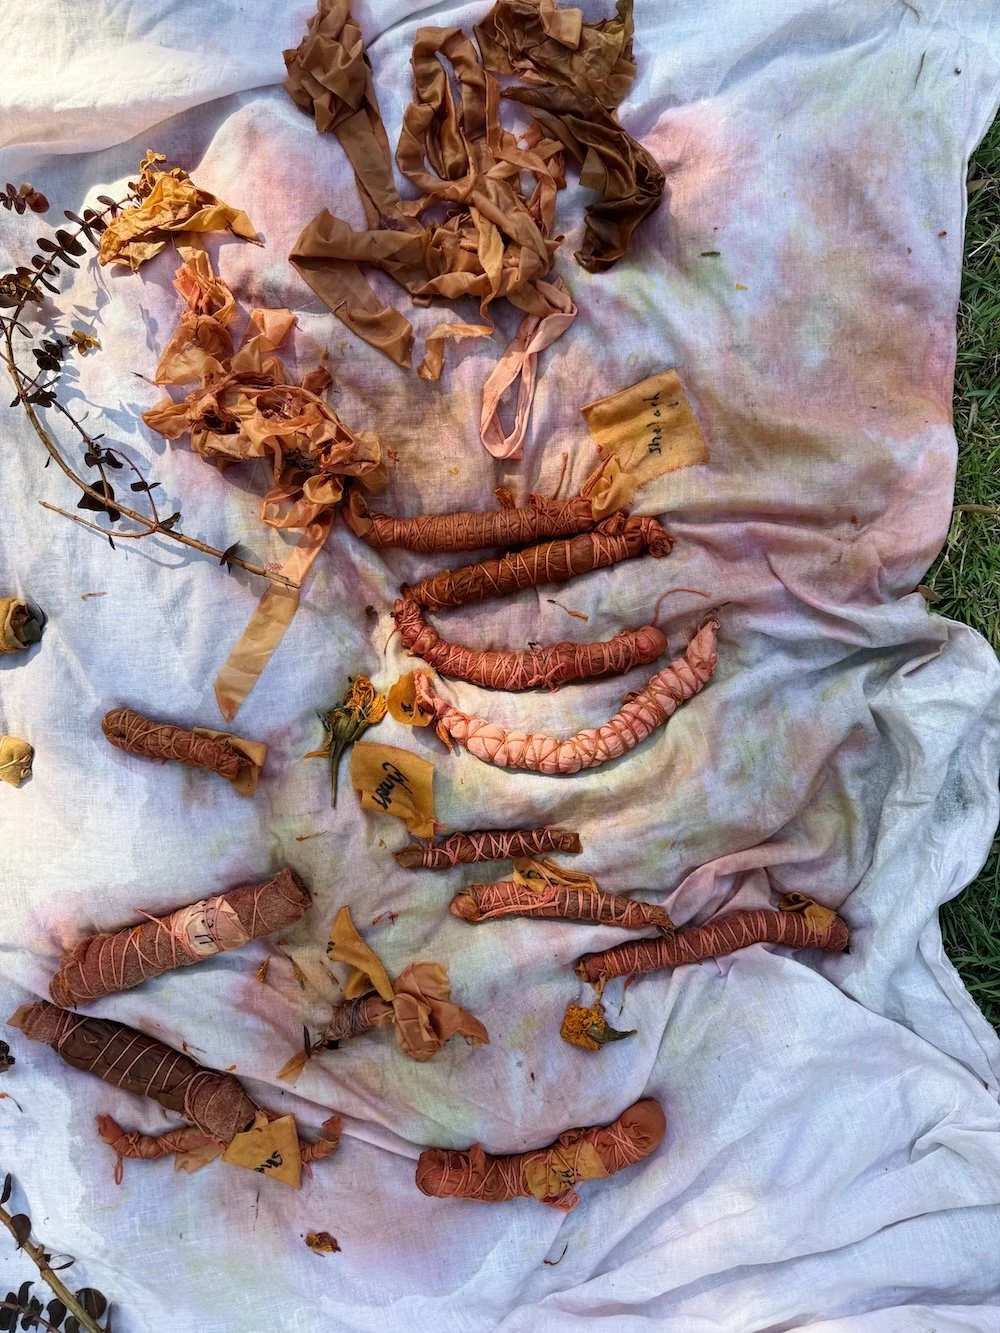
Step 3: Roll or fold the fabric
Lay a piece of barrier cloth on top of your arrangement. This can be another piece of fabric that you want to dye, or a previously dyed fabric - note that you can use a coloured piece of barrier cloth that may transfer during your dyeing process.
For bundle dyeing or eco printing roll the fabric tightly around a stick or dowel, or even just roll it up onto itself. Or fold it concertina-style, sandwiching petals between layers.
Tie firmly with string or twine — the tighter your bundle, the more defined your prints will be.
Step 4: Steam, simmer, or solar dye
Steam and simmer:
Place your bundle in a steamer or pot and steam for 45–60 minutes. The heat helps the natural dyes transfer from the plant matter into the fibres. You can immerse it fully in the water, or use a steamer and let it sit above the water. Make sure the lid is tightly fitted.
Allow the bundle to cool completely — this can take several hours or overnight.
Alternatively you can solar dye your bundle, which is a lovely way of using the sun’s heat and minimising the need to electricity:
Place your bundle into a glass jar, push as many spare petals into it and around as you can.
Fill the jar with kettle-boiled water.
Close the lid tightly; it’ll end up making a seal.
Leave in the sunshine for at least 4 days, but up to 10 days is good as well. It depends on the heat of the days, the fabric you’re dyeing, the plant materials (some give their colour quicker than others), and the results you’re wanting.
I sometimes have a little peek at the fabric to see if I want to keep it longer, or if I’m happy with it after 4 or 5 days.


Step 5: The unwrapping - the best part!
The next morning, once your bundle is cooled down, gently untie and open your bundle to reveal your floral prints and patterns. Each one is different — a small piece of botanical alchemy.
Allow to dry with the petals still attached. They’ll slowly fall off as they dry.
Once the fabric has been left for a day, you can rinse lightly in cold water and hang to dry in the shade. Rinse until the water runs clear. I like to leave my dye on the fabric for a night, as this helps to ‘cure’ the dye to the fabric.
Only use a ph-neutral soap, if you find you need to wash it. Natural dyes can be very ph sensitive, and this can shift the colour.
Colour notes and flower suggestions
Once you start with natural and botanical dyeing, you’ll find there are possibilities everywhere. This is only the beginning. Here’s some plants you might like to try. These gives great and immediate results, with minimal processes or other techniques and knowledge needed.
Marigold flowers - you can use these fresh or dried.
Deep red rose petals
Dark purple sweet peas
Onion skins - both brown and red
Dahlias or zinnias
Turmeric - which this is considered a fugitive (not fully colourfast) dye, it can be used in conjunction with other dyes. Read this tutorial on dyeing with turmeric powder
Leaves that have dark tannins - eucalyptus, maple, silky oak, persimmons, rose leaves. (These don’t work as well for solar dyeing, as they do need the heat to extract their pigments).
Here’s some more suggestions of flowers and leaves to use for natural and botanical dyeing
Dip in iron water afterwards for a muted hue. It can turn some colours purple, green, or grey. Be sparing with the iron water, as it can weaken the fibres of your fabric. Don’t leave it soaking for too long.
Tips for better results
Use silk or wool if you want stronger colour — protein fibres love natural dyes.
Keep a dye journal — note your flower type, fabric, and result.
Try layering petals for more depth and texture.
Use seasonal blooms — whatever’s growing in your garden right now can inspire your palette.
Experiment, have fun, be prepared to make mistakes and allow your dyeing to evolve over time.
Learn more in my Natural Dye & Slow Stitch Roll-up Pouch course.
Safety notes:
Use a saucepan and dyeing equipment that you will not be using in your kitchen for cooking. Even though you’re using natural dyes they can still have chemicals that aren’t tasty or good for eating.
Dye in a well ventilated room. In your kitchen is fine, as long as you keep windows open, or extractions are working well.
You may have an allergic reaction to some plants, so take care.
When collecting flowers, make sure to leave enough for the pollinators as well. A general rule is to take less than 10%.
If you’d like to immerse yourself deeper into the world of natural dyeing I have a lot more tutorials here. Or you could check out my friend, Rebecca Desnos’ online natural dye courses and membership.